
Connect Two Monitors to an M1, M2, or M3 MacBook
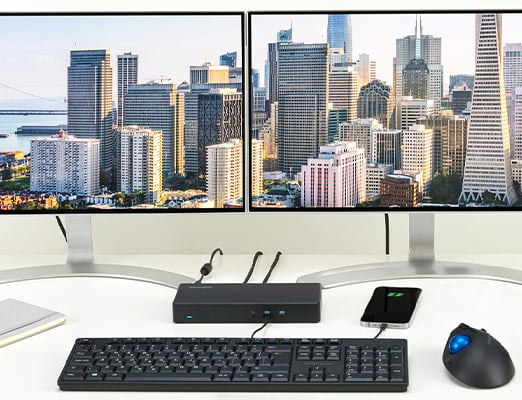
A compatible DisplayLink dock and one small app can give your MacBook a practical two-monitor workspace, even when macOS normally allows only one external screen.
Why an ordinary USB-C dock may not work
Many M1 and M2 MacBooks officially support only one external display. Adding a basic dock gives you more sockets, but it does not automatically raise that display limit. The result is often one working monitor while the other stays blank or merely shows a copy of the first.
DisplayLink provides the workaround. It uses an app plus a compatible adapter or dock to send an additional picture through USB. The important word is compatible: the product description should specifically mention DisplayLink and macOS support. A dock advertised only as “dual HDMI” is not enough.
There is one useful M3 exception. Apple says base M3 MacBook Air and MacBook Pro models can run two external displays with the laptop lid closed. This requires an external keyboard and mouse or trackpad, power, and a sufficiently recent version of macOS Sonoma. If you want to keep the built-in MacBook screen open alongside two monitors, a DisplayLink setup remains the practical route.
What to buy before you begin
The simplest beginner-friendly choice is a dual-monitor DisplayLink dock. It lets both monitor cables meet in one place. Check the dock maker’s compatibility page before buying, because supported resolutions and refresh rates vary. Refresh rate means how many times the picture updates each second.
You also need the correct cable for each monitor. HDMI and DisplayPort are the common choices. Look at the sockets on the monitors rather than guessing from the cables already in your drawer.
- Choose a dock or adapter that explicitly lists DisplayLink support for macOS.
- Check that the dock has two video sockets matching your monitors.
- Obtain one suitable video cable for each monitor.
Install DisplayLink Manager
The helper app must be installed and running for a DisplayLink-connected screen to work. The exact installer wording can change between macOS and app versions, so follow the prompts shown on your Mac.
macOS may request screen-recording access. That sounds alarming, but here it means the app needs permission to capture the Mac’s picture and send it to the monitor. It does not mean you are starting a video recording.
- Download the current DisplayLink Manager for macOS from the link supplied by your dock manufacturer.
- Open the downloaded installer from your Downloads folder.
- Complete the installation by following each on-screen prompt.
- Use the installer’s button to open System Settings if macOS requests permission.
- Turn on the switch beside DisplayLink Manager on the permission page that macOS opens.
- Click “Quit & Reopen” if macOS asks to restart the app.
- Open DisplayLink Manager from the Applications folder.
- Enable its launch-at-login option if the app offers one.
Connect the two monitors
Now comes the satisfying part. Connect one item at a time so you can easily spot a loose cable. Your screens may blink or briefly go black while macOS detects them. That is normal.
- Connect the DisplayLink dock to its power adapter if it uses one.
- Connect your MacBook to power.
- Connect the dock to your MacBook.
- Connect the first monitor to the dock.
- Connect the second monitor to the dock.
- Turn on both monitors.
Arrange the screens so the pointer moves naturally
macOS represents each screen with a rectangle. Arrange those rectangles to match the monitors on your desk. If your second monitor sits on the right, its rectangle should also sit on the right.
- Open System Settings from the Apple menu.
- Select Displays in the System Settings sidebar.
- Open the arrangement view shown for your connected displays.
- Drag each display rectangle into the same position as the physical monitor.
- Select each monitor to choose a comfortable resolution.
If one monitor stays blank
First, make sure DisplayLink Manager is open. The extra display can disappear when that app is not running. Starting it again is often all that is needed.
If both monitors show exactly the same thing, look for a mirroring setting in Displays and turn mirroring off. Apple also recommends testing a display directly from the Mac if a hub or dock will only mirror it. This can help identify whether the trouble is the monitor, cable, or dock.
- Open DisplayLink Manager from the Applications folder.
- Reconnect the dock’s USB-C cable to the MacBook.
- Replace the cable on the blank monitor with a known-working cable.
- Turn off display mirroring in System Settings if both screens are identical.
- Connect the troublesome monitor directly to the Mac as a test.
Bottom line
For an M1 or M2 MacBook, the dependable recipe is a genuine DisplayLink dock, the DisplayLink Manager app, and two suitable monitor cables. Base M3 owners can also use Apple’s lid-closed method, but DisplayLink is the slick move when you want two external monitors while keeping the MacBook screen available.
Sources
Steps grounded in the guidance above; wording and walkthrough are PcFixin' originals.
Need a hand?
If you'd rather someone just take care of it, PcFixin' can help — residential or commercial.
About PcFixin'